We just offered our class on Photoshop Elements Organizer, and many of our students wanted to know how we deal with duplicate photos. Yes, once you get started organizing, you might find you have the same photo in multiple places on your computer. We wrote about this issue in 2017 (you can read those blog posts here and here), but it might be time to revisit the topic since many of us have some time on our hands.
A couple of weeks ago, I (Deb) did just that. I thought I was going to have to buy a larger hard drive, but I found I had gigabytes (!!) of duplicate files. When I was finished deleting duplicates, I had regained tons of space. I did have one little “oops” moment (well let’s call it an “oops” couple of hours), so I want to help you avoid that problem. Read on!
Duplicate File Finder and Easy Duplicate Finder
There are many programs that will search for duplicate photos, music or whatever type of file you tend to hoard. Some programs search for duplicate names and file sizes, some search byte by byte, and others search for visually similar images. Each has its advantages. I’m going to talk about using Duplicate File Finder by Ashisoft, Easy Duplicate Finder by WebMinds, and Adobe’s “Find visually similar” searches in Photoshop Elements Organizer.
If you’re a Mac user, try Easy Duplicate Finder (EDF). If you’re a PC person, try Duplicate File Finder (DFF). Each has a free version, and they both work similarly. EDF is more “icon based”—you have to hover over icons to find out what they do. DFF uses words.
Select Drive/Folder to Search
The first thing you have to do is choose a drive or folder you want to scan. I chose the folder that contains the contents of the Google Drive that Kris and I share. Since there are two of us using the drive, we easily can have duplicate files. In both programs you can also choose to exclude Folders. In this example, I’m looking for exact duplicates (byte-by-byte). Click on the images below for larger, more legible images.
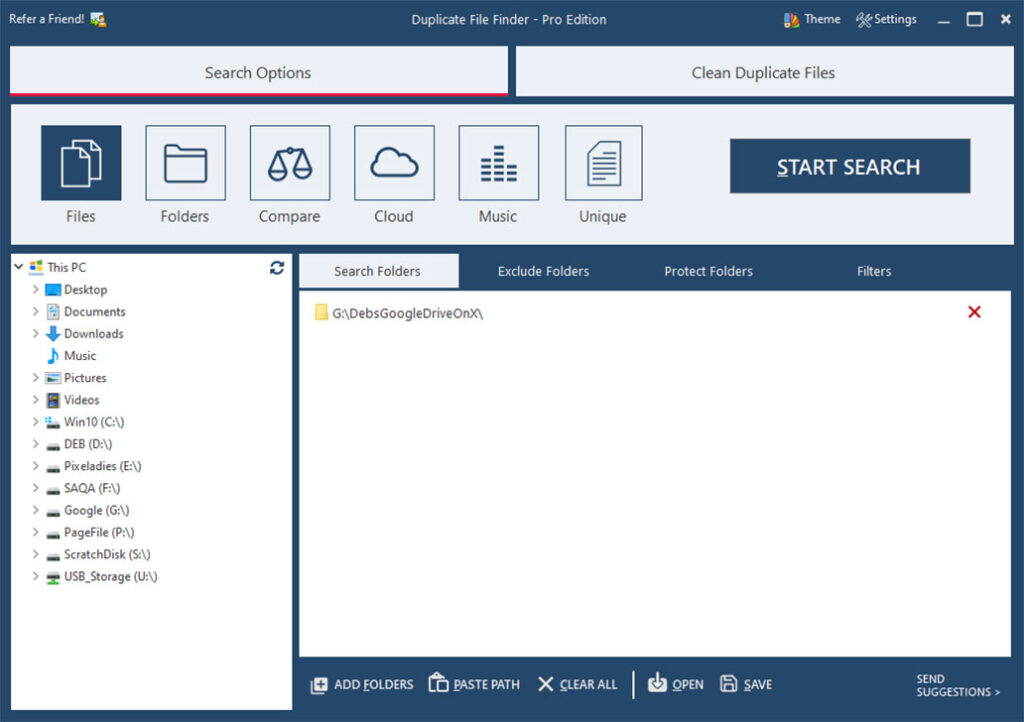
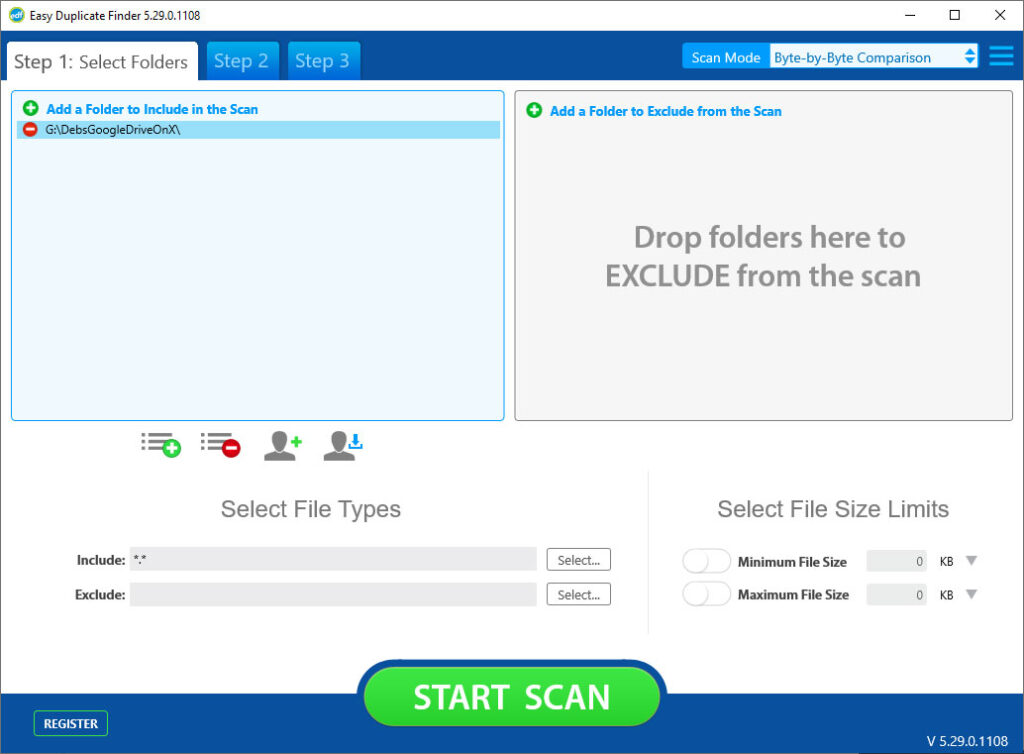
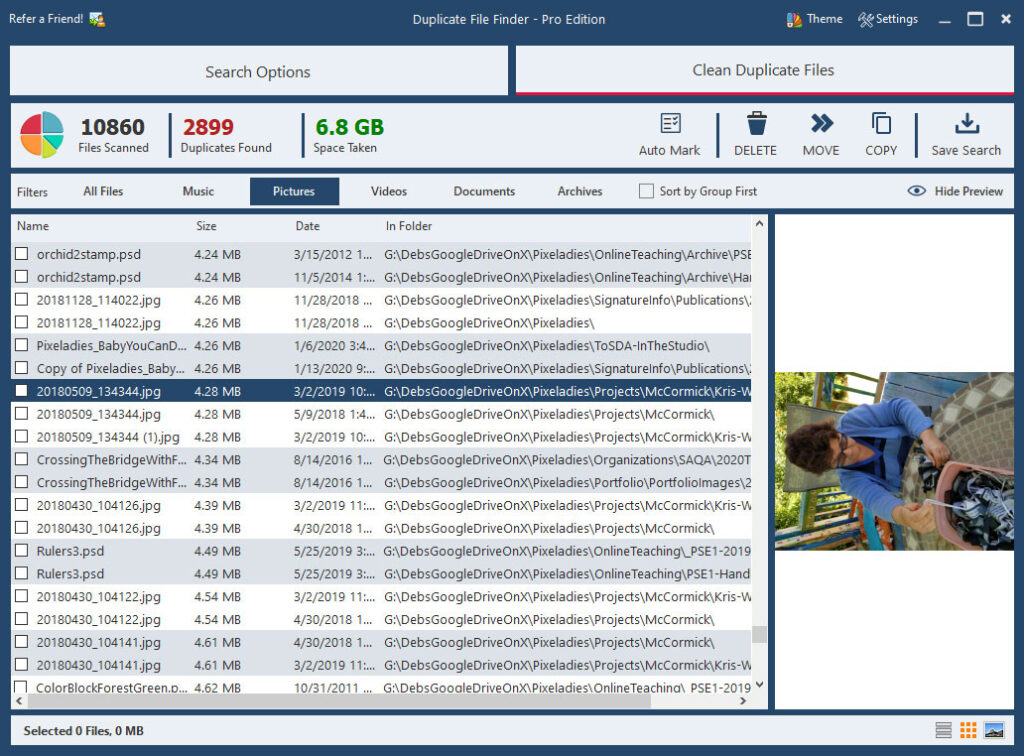
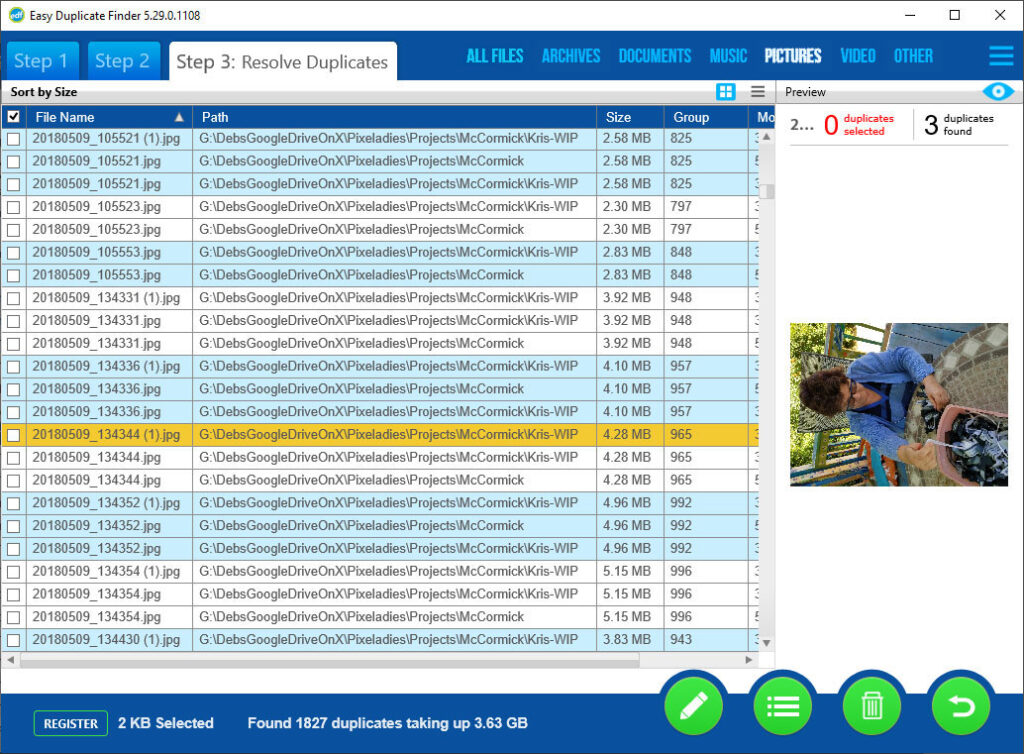
Start the search and, depending on your settings and how large your folder/drive is, it may take minutes or seconds. Once the search is complete, you will proceed to a list of duplicate files. The duplicates will appear in groups (every group has a different background color, so you can distinguish the groups from each other). I thought I had the settings set similarly, but as you can see, the two programs found different numbers of duplicates.
Review and Delete Duplicate Files
I never, repeat never, just delete the duplicate files. Look at the files first. In this step I have clicked on the “Pictures” tab so that I’m just looking at the files that are pictures. I have found a photo that appears three times in this drive. All are exactly the same image. Both programs show a preview of the photo, the name, file location, date and size. Two of the images are in the same folder. One is in a different folder. So which one should you delete? That’s a decision you have to make. I chose the file with the “(1)” at the end of the name, and the one that wasn’t in a sub-folder.
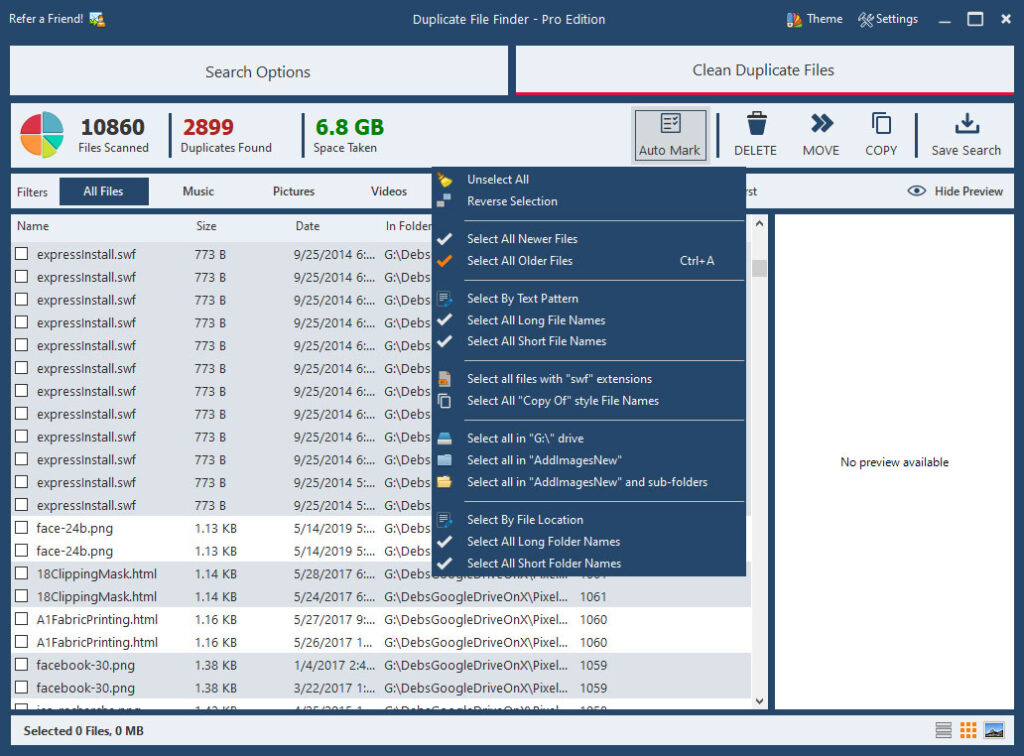
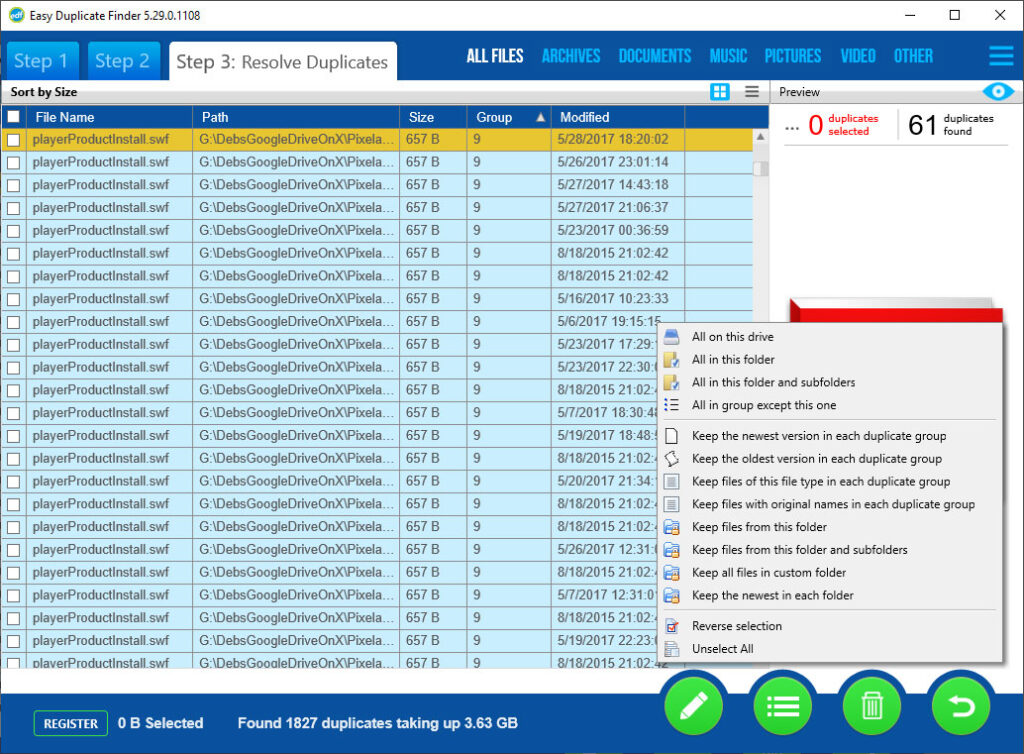
What’s great about either program is they have ways of marking bulk photos. You can delete the file with the longest name (think of the filename-edited-1.jpg that Photoshop Elements creates when you edit an image from the organizer), or the one with the most current date. Remember, these are exact duplicates of each other. Look at the options the programs have:
Sometimes, however, you do NOT want to delete duplicates. In the following example, there are dozens of duplicate files (I clicked on All Photos, not just Pictures) with the same name in different folders.
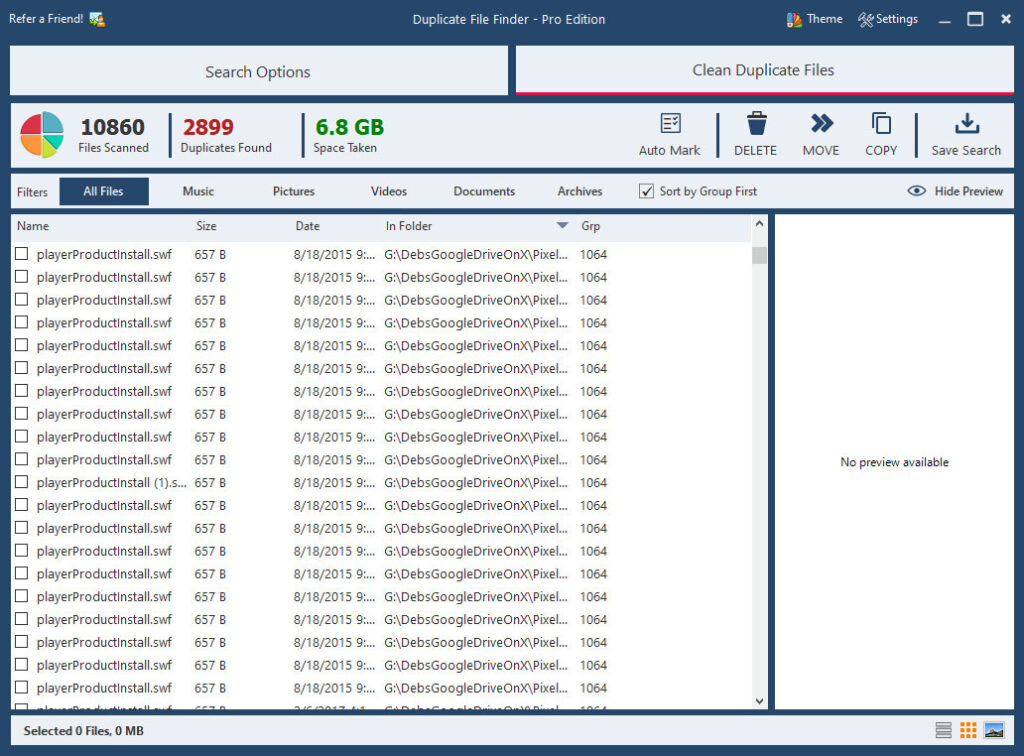
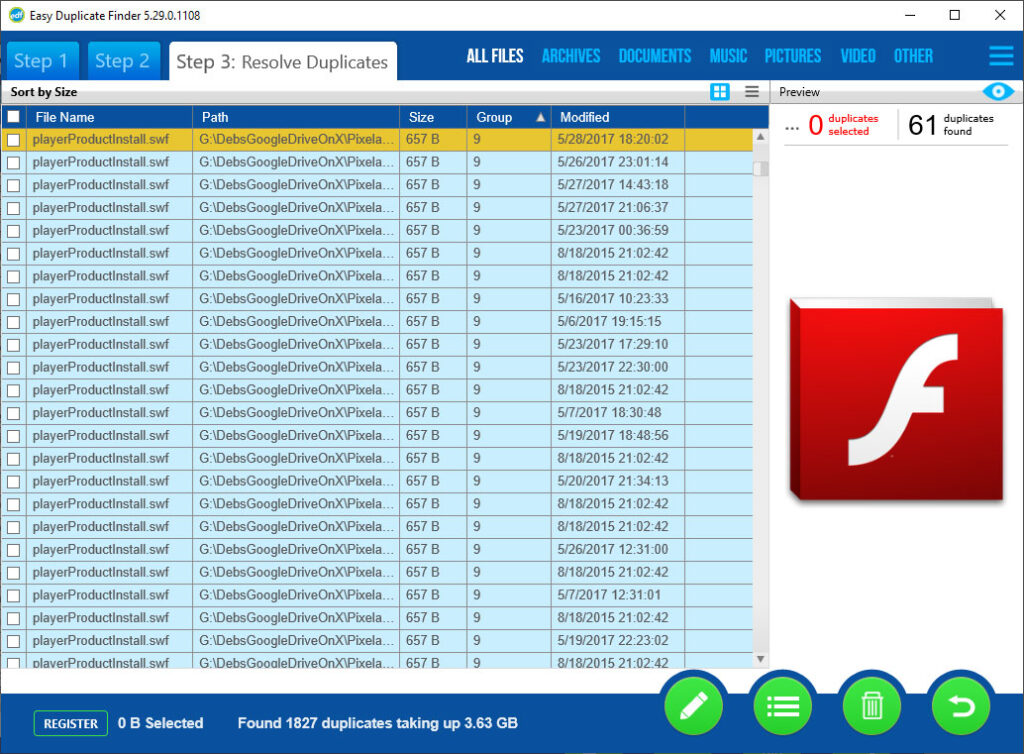
These files are used to view the class videos we make. Each video (in its own folder) needs this file. If I delete this file from any of the folders, that video won’t play. Yes, that was my “oops.” Fortunately I could copy that file back into each folder, or restore it from the recycle/trash folder.
In the next example, the files had different names and were located in different folders. Those files are required for the video to play, too. Fortunately I didn’t delete those files.
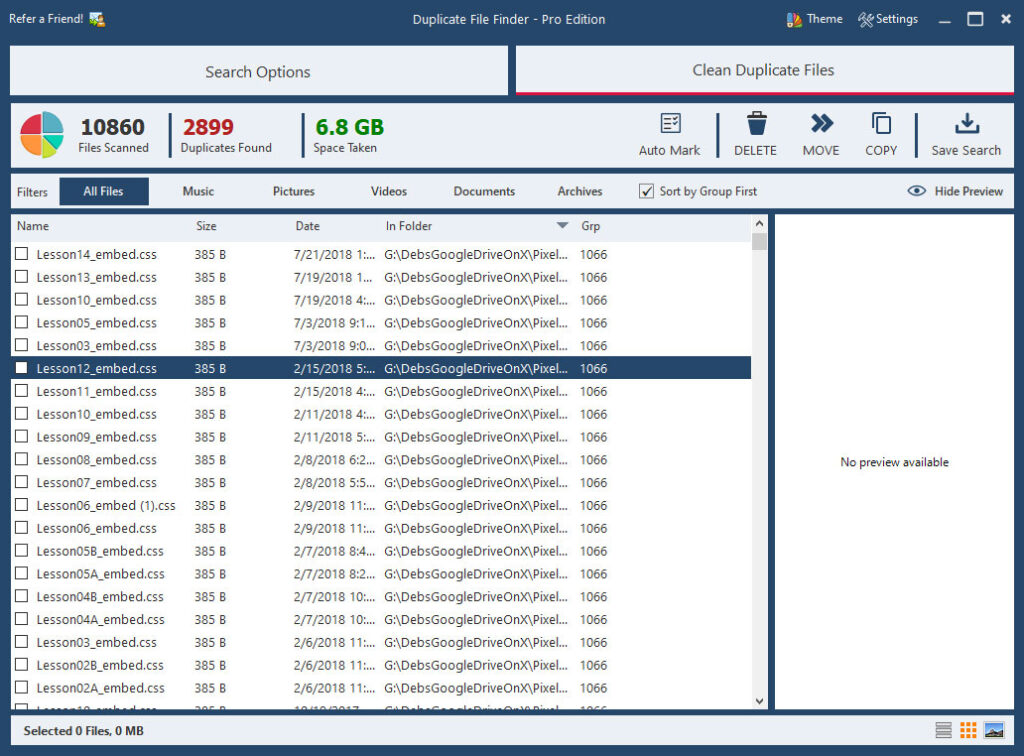
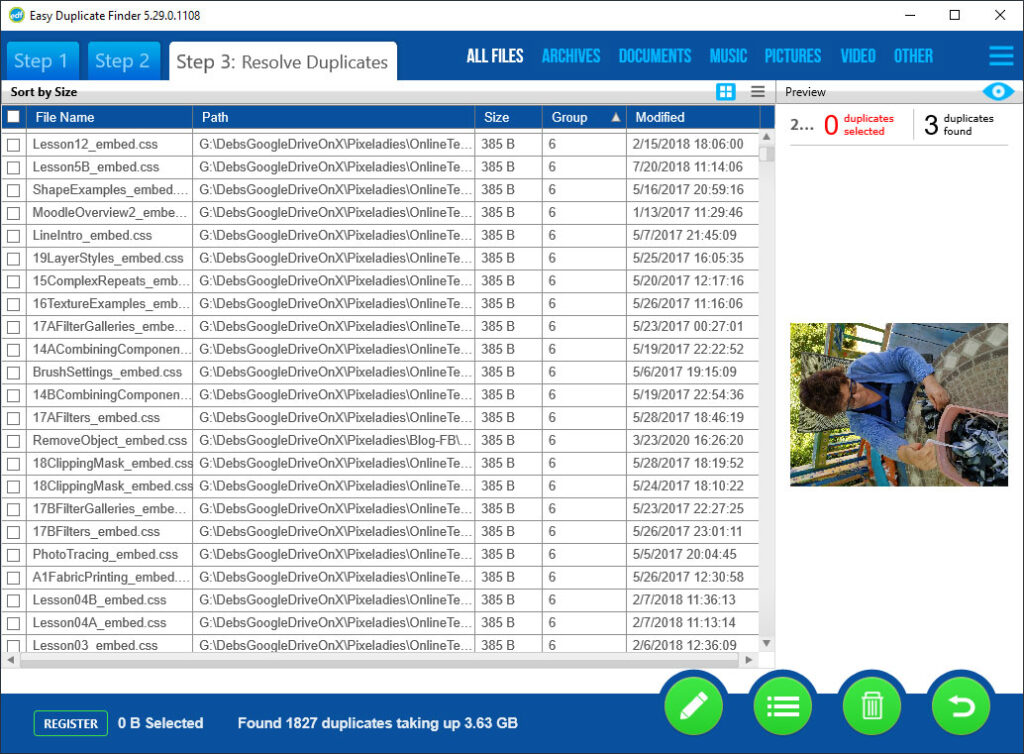
The big take-away is you must be very careful when deleting files. And the bigger take-away is that if you delete the photos using these or any other program, and you already have these photos in your Photoshop Elements Organizer catalog, Organizer is going to have a conniption fit. What I mean is that you will have a lot of missing files in the catalog. Sometimes it’s worth it. You will just have to delete the thumbnails of the deleted images from the catalog. (Leave a comment if you want to know how I fix that.)
Visual Search in Photoshop Elements Organizer
If you use Photoshop Elements Organizer, there’s an option to search for visually similar images. The program will only search for photos that you have imported into your catalog. First click on a photo to which you want to find similar photos. Then from the menu, choose Find > By visual searches > Visually similar photos and videos.
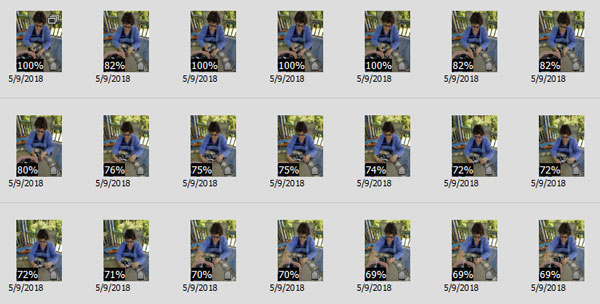
You might get a prompt to index files, which may take a while. Or, you can choose to continue with the search. It’s a good idea to let Organizer index the files, but either way it might appear that the program is hanging up. Be patient. Eventually you will see a bunch of thumbnails for images that are similar to the photo you selected. In the lower left corner of each image is a percentage number that tells how similar the photos are.
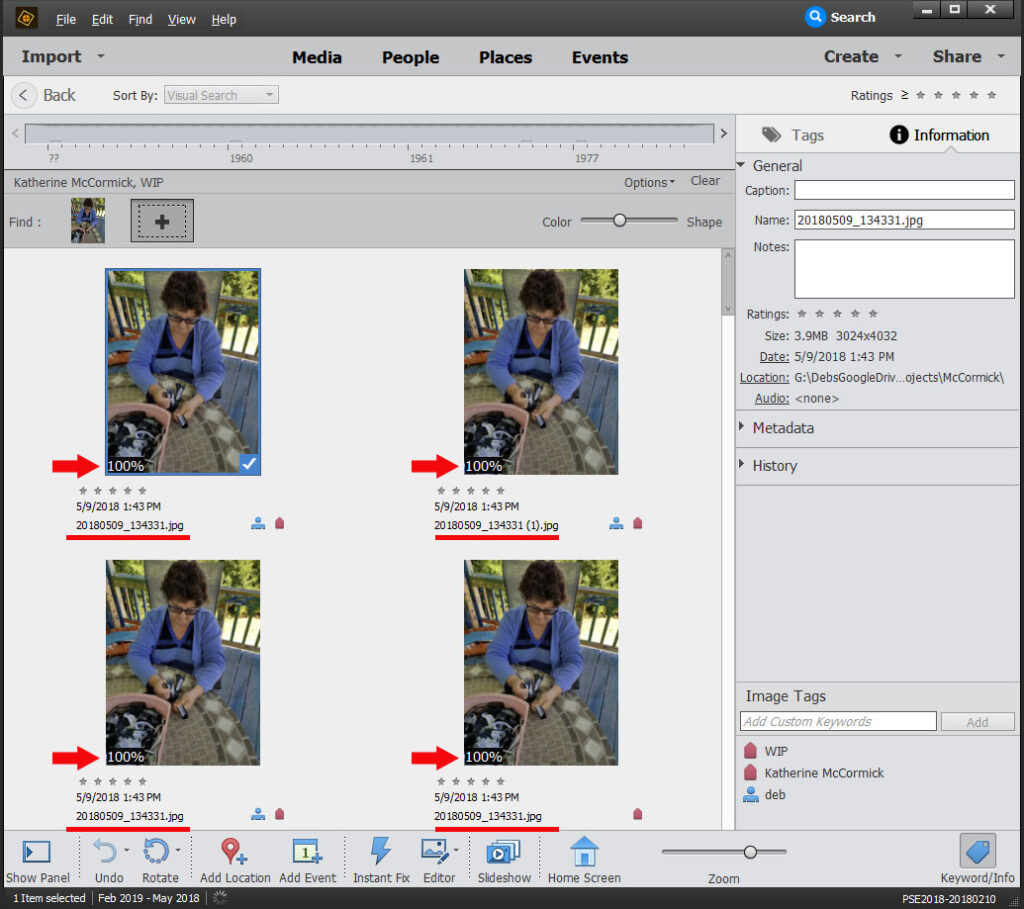
Organizer found four 100% matches for the image used in the first example above. If you open the Information palette and click on one of the images, you will see the file name, size, location, and date of the photo. Below is a screenshot of the information for each of the photos.
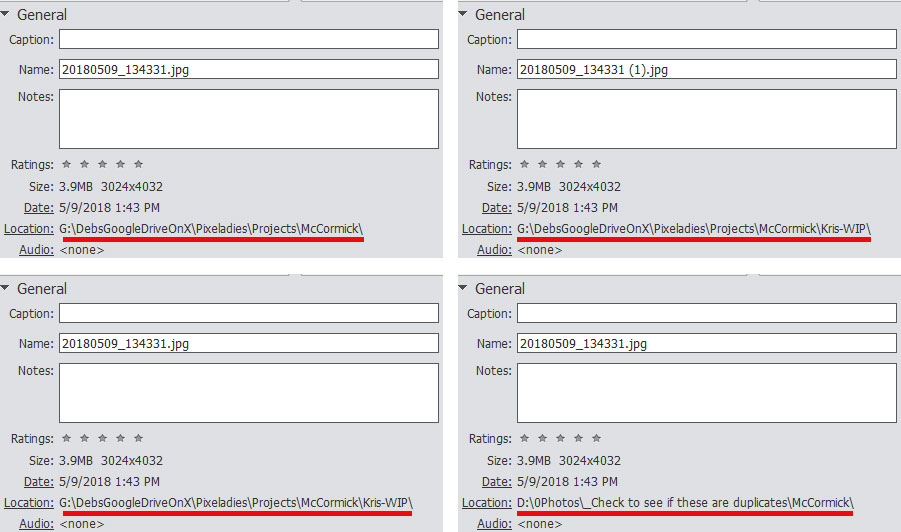
Why did organizer find four photos instead of the three found by the other programs? In the search using DFF and EDF, I only specified one drive (G). Had I searched the whole computer initially, DFF and EDF would have found all four photos. Now, if you want to delete any of the photos from your Organizer catalog, click on one or more and press the delete key. If you’re sure you don’t want the duplicates on your computer at all, click the box that says “Also delete selected item(s) from your hard disk.” If you check that box, the photos will be gone forever! Use this option carefully.
In addition to the 100% matches, Organizer also found many similar photos. Two are shown below.
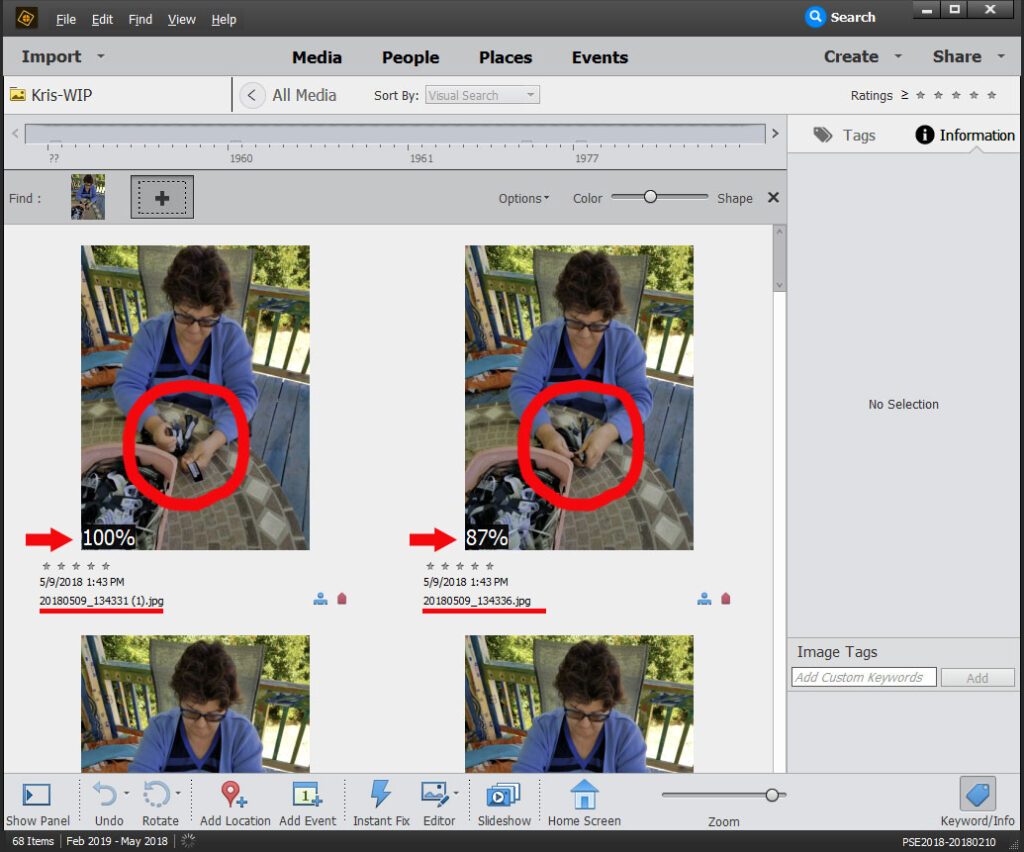
Notice the similarity is only 87%. Look closely and you can see that my hands are in a different position. I kept both those photos!
Stack Photos
Delete any of these similar photos or “stack” them together by selecting two or more photos and choosing Edit > Stack > Stack selected photos from the menu.
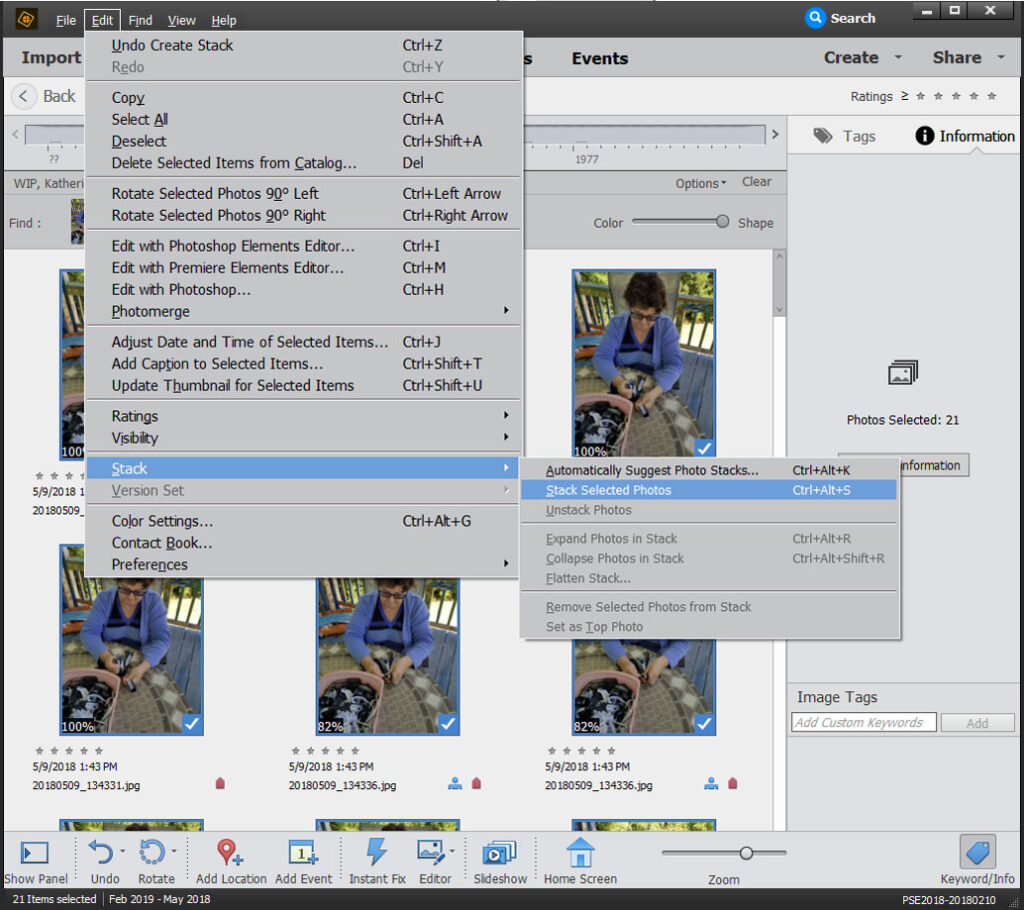
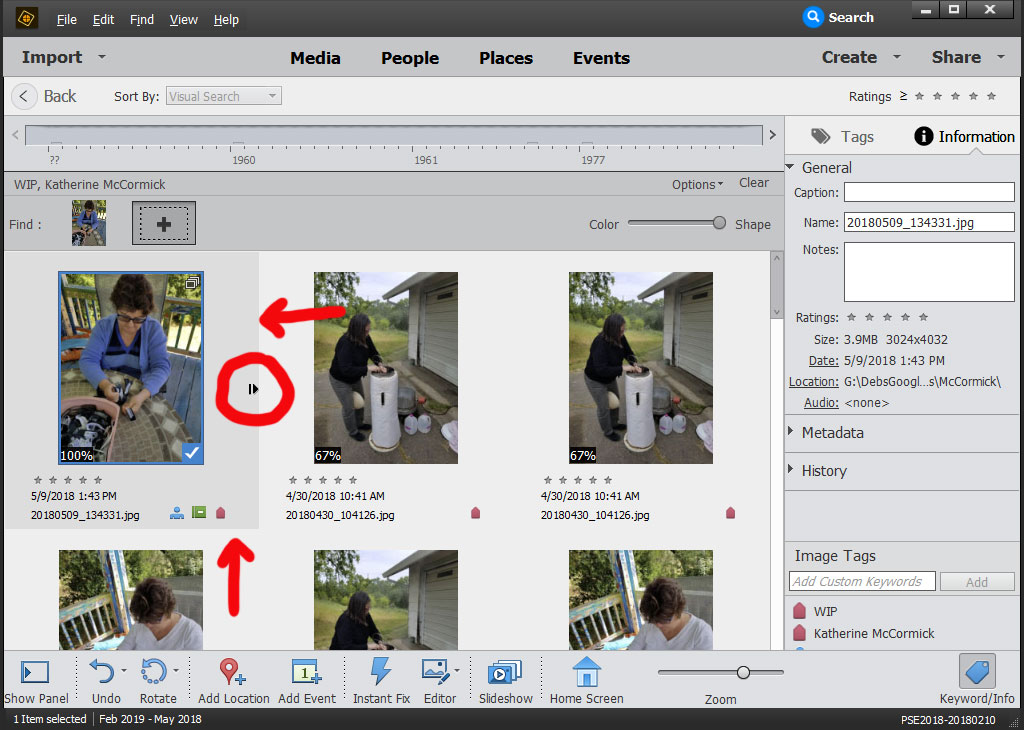
These photos will then be grouped together, so you don’t have to look at all of them every time you look in the catalog. To view all the photos in a stack, choose Edit > Stack > Expand photos in stack, or click on the more arrow on the right side of the image. You will know if an image is a stack of photos because the frame around stacked photos is a little bit darker.
Finding duplicate files can be a bit time consuming, but the end result is fantastic. I now have lots of freed up space on my hard drive and don’t have to look at so many duplicate files in all different parts of my computer. Aaah!

6 responses to “Finding Duplicate Files”
Thank you, I think this will be very helpful!
Thanks, Vera.
Great explanation thanks. How do I delete the missing files from organiser please? are they the thumbnails with a question mark in the top left hand side?
Sorry for the delay, Christine. Yes, the missing ones have the question mark. So whenever you come across one of those photos, you would just delete it from the catalog (no need to click delete from hard drive, because the photo isn’t really there).
****If all your images are all on your (internal) hard drive****, you could go to the menu and choose Find > All missing files. Then select all of them and press the delete key to remove them from the catalog. But that’s a big IF.
PLEASE NOTE if you have photos on an external hard drive and the drive is not plugged in to your computer, anything on that drive will be listed as a missing file. Don’t make the mistake of deleting those files.
The problem is, if you have multiple external hard drives containing your photos and you can’t plug them all in at the same time, PSE will won’t prompt you to attach the required hard drive. This is really a pain in the patootie now that hard drives are not as expensive. So if you really want to help, Go to Adobe’s Wish Form https://www.adobe.com/products/wishform.html and request that they have an option to classify external hard drives as removable media. That way PSE won’t see the file as missing, but just that the media it’s on (external hard drive) isn’t attached. If Adobe did this, we could use Find > All missing files from the menu and have a reasonable expectation that the files were really missing and not on an external drive.
I’m learning so much from you, don’t want it to stop!
Thanks, Donna! We’ll keep you posted on upcoming classes.