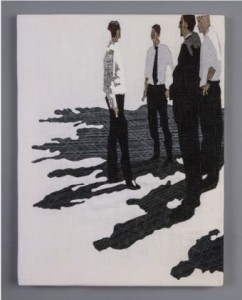
A few months ago, I was invited to curate Studio Art Quilt Associates’ online gallery for August. I wrote about the curating process about a year ago when I created my dream collection of SAQA auction quilts. (https://www.pixeladies.com/curating-a-dream-collection/) This time I selected a group of quilts from among the quilts posted on the Professional Artist Member (PAM) web pages. I looked through the images several times before I was able to settle on a theme. This time, I started with two images that I wanted to build my exhibition around.
So how do I build an exhibit around these two pieces? Men in suits? There weren’t 10-20 quilts of men in suits. People? That’s been done. So I settled on quilts that were primarily black and white. I looked through the images again. Yep, there were 40 or so black and white-ish quilts.
So here’s where the tech part comes in. The images I got to see were itty-bitty thumbnail images in a database. I needed to see larger images. First bit of techiness: get a second monitor. Kris and I have had two monitors each for a few years now. Usually I set it up for showing the main Photoshop area on the large monitor and the tools on the smaller.

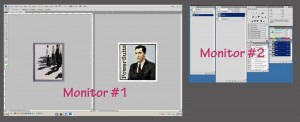
For this task, I put the database on one monitor and the SAQA website, which had larger images of the quilts, on the other monitor. Then I opened Photoshop, grabbed the larger images, and made a new file out of each of the black and white quilts. To do this, right-click on the image you want to steal*, then choose copy image. Then go into Photoshop, choose File > New, then click OK when the dialog box opens with some weird image size as the default (this is the size of the image you just copied). Then press Ctrl/Command + V to paste the image into the new file. In Photoshop Elements, there’s the “image from clipboard” option under File > New. You don’t have to paste the image into the file in Elements. Save all the images. I did this for all of the black and white quilts. (You get into a rhythm after the first couple of quilts).
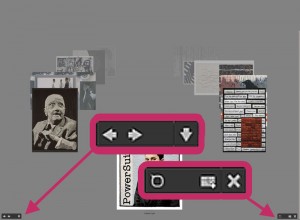
Next I opened Bridge. This is part of Adobe’s Creative Suite, so it’s not available for Elements users.** Navigate to the folder with your images. You’ll see the thumbnails of the quilts. Not much use, right. So from the menu bar, choose View > Review Mode. The images will appear like this:

Use the right and left arrow buttons in the lower left to scroll through the images. If you decide that an image just isn’t working in the exhibit, use the down arrow button to remove it from contention. Bridge doesn’t delete the image; it just removes it from the review. Continue scrolling and removing images until you have a nice exhibit. To view just the images you have selected, click on the square-ish icon to the left of the “X” in the lower righthand corner. Name the grouping (say, Round 1) and as soon as you click OK, you will see just those images in Bridge. You can rearrange the images in any order you like and review the quilts again.
Click here to see my exhibition, “Primarily Black and White.” And, no, even though I started with Power Suited Him, it didn’t end up in the final show.
*Remember, whether images have the © symbol or not, they are copyrighted, and if you use these images without permission, you are stealing! Thanks, Cyndi and Leni for allowing me to use your images.
**I still love the Organizer in Elements for cataloging my photos. I use Bridge for its reviewing feature.


4 responses to “Tech Tuesday: Curating with Adobe Bridge”
And that’s what makes the Pixeladies pixel ladies! What a wealth of information. No wonder you are in demand as teachers of Photoshop & Art Quilt techniques.
Thanks, Marcia.
Wow, you started with mine and that other wonderful piece by Cyndi Souder?!? I am honored. Great post.
Love your peeps, Leni.